Master Jobs, Sub Jobs
The Master Job capability allows you set up and cost out complex projects.
- View and track part of the budget and manage and view the project as a whole.
- Split a project over sub jobs which is spread over a number of job types.
- Allocate a budget to each sub job.
- Bill clients for each sub job or bill for the entire master job as needed.
What is the difference between Jobs, Sub Jobs and Phases?
Jobs and sub jobs are assigned Job Types.
Phases on jobs and sub jobs inherit the Job Type from the job.
There cannot be multiple job types on the same job.
Phases can and should have Kinds associated with them.
Using the right job type and kinds helps JobBag accurately report financial information and run accounts correctly. It is important that these are used correctly for your specific organisation.
When you use sub jobs you are able to view the job’s status of the master job and each sub-job status. You are not able to do so when you use phases.
Any job can become a master job when it has sub-jobs linked to it.
How to create a Master and Sub Jobs
There are two methods:
- Create a job and add sub jobs to it or
- Link existing jobs to a master job
Create a master job and add sub jobs
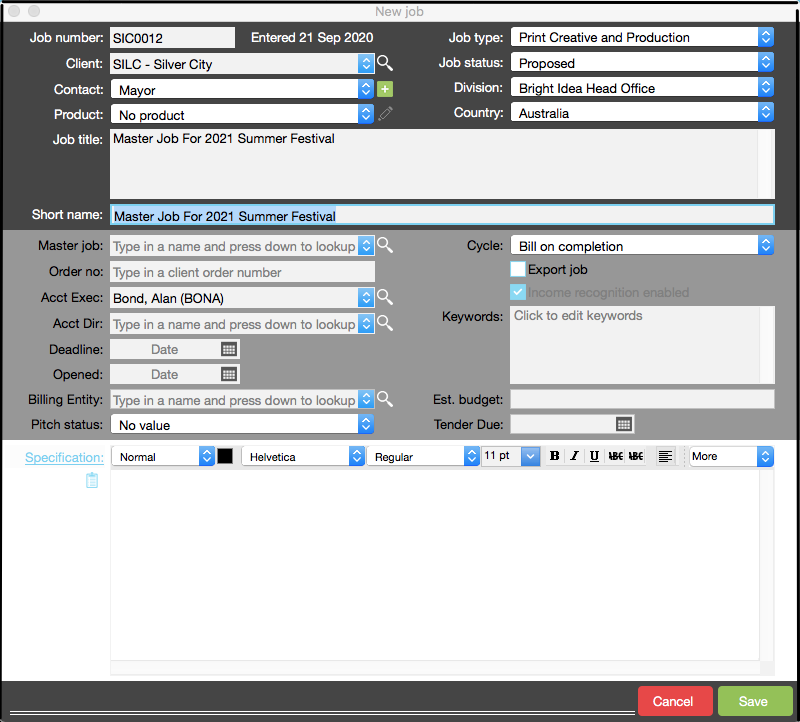
Step 1 Create a job eg a master job for a campaign
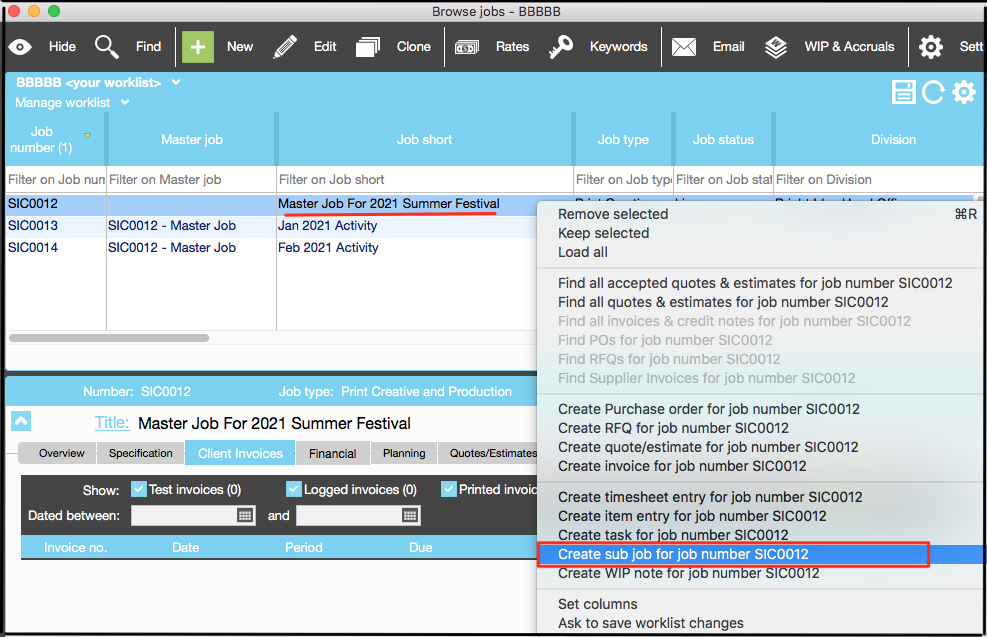
Step 2 Right click on the job to create a sub job
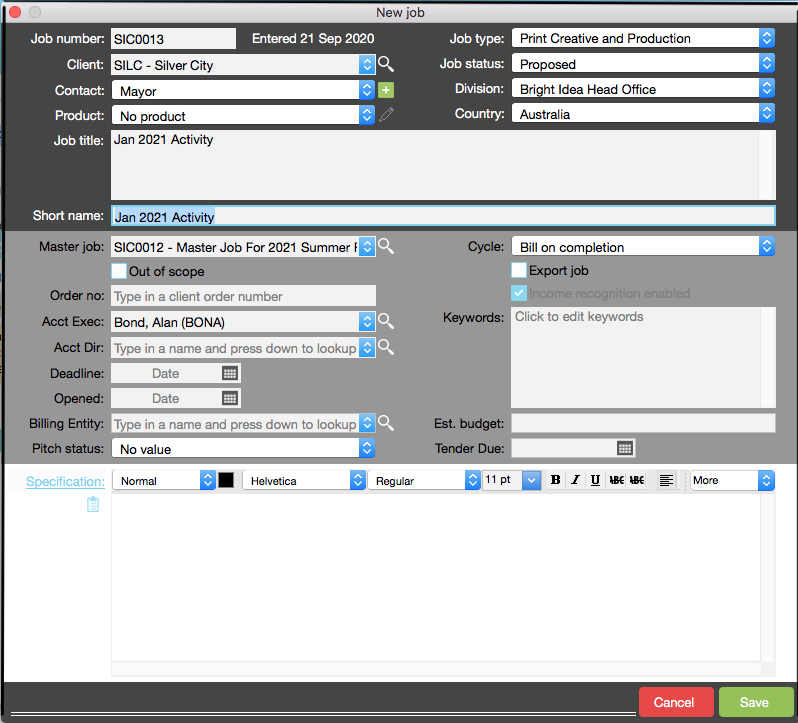
Step 3 Example of a completed sub job
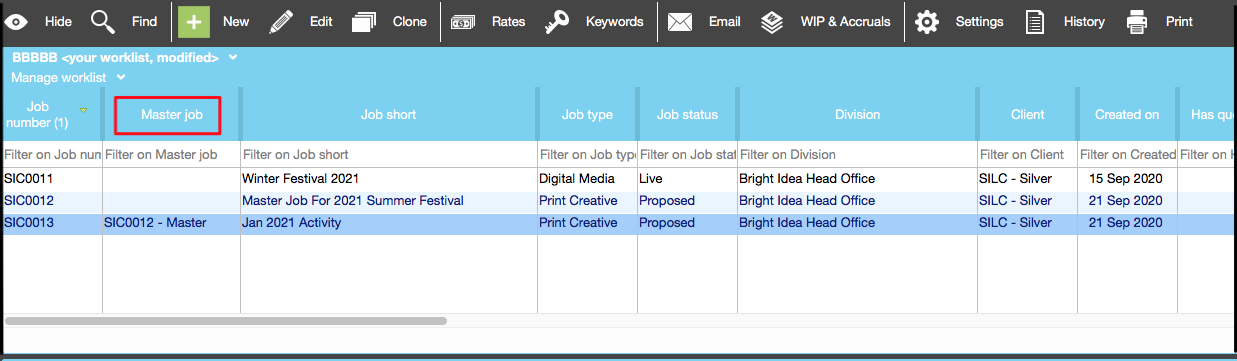
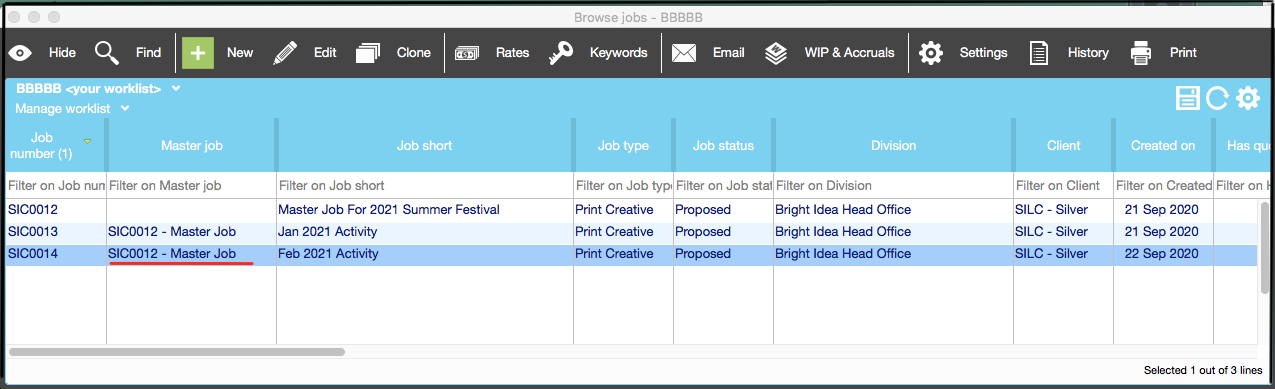
Step 4 You are now able to view the master and sub jobs in the jobs worklist
|
Link an exisiting job to a master job
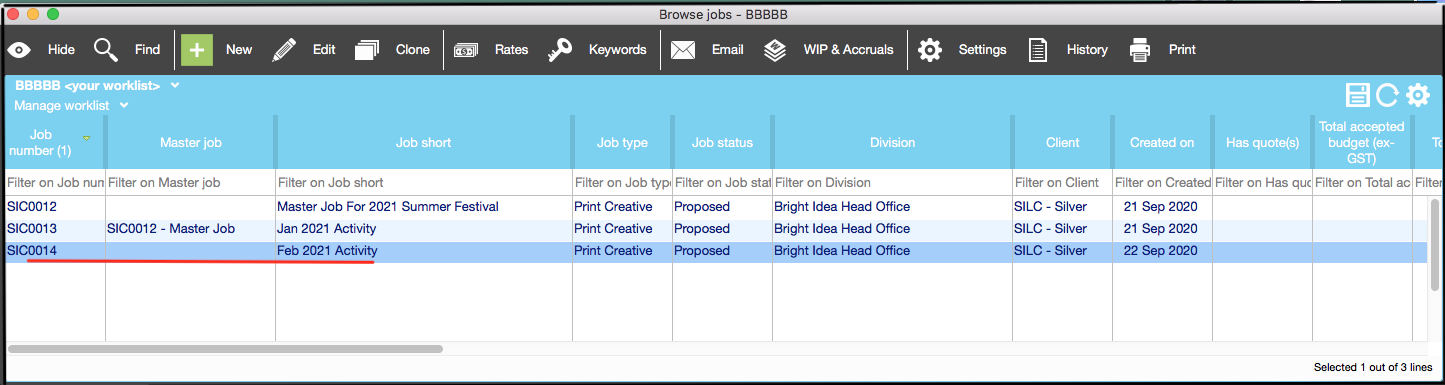
Step 1 A job was created without a master job
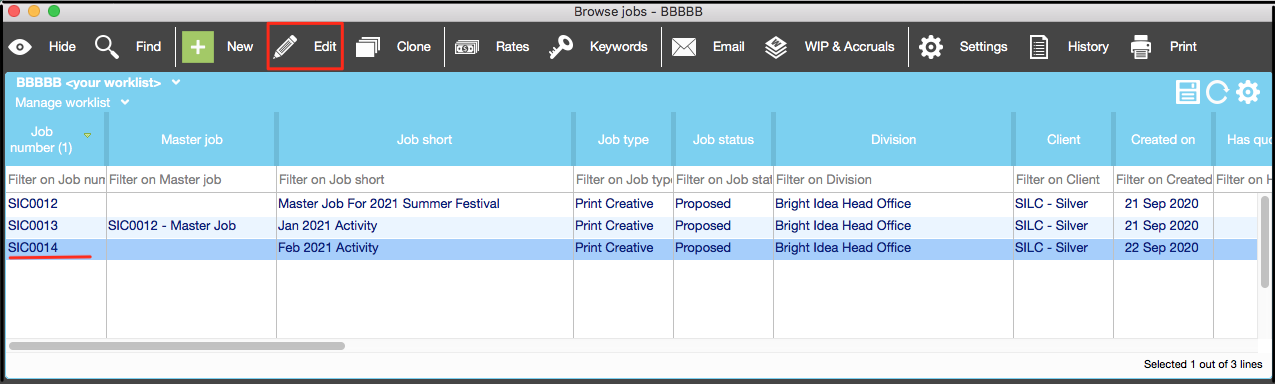
Step 2 Highlight the job and either double click or click on the edit icon
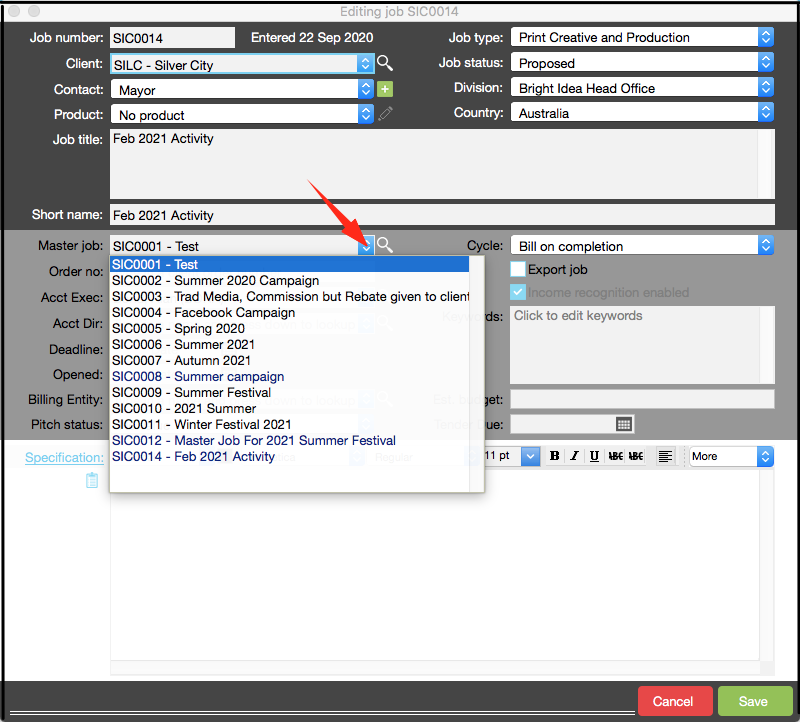
Step 3 Select a job from the drop-down list to become the master job
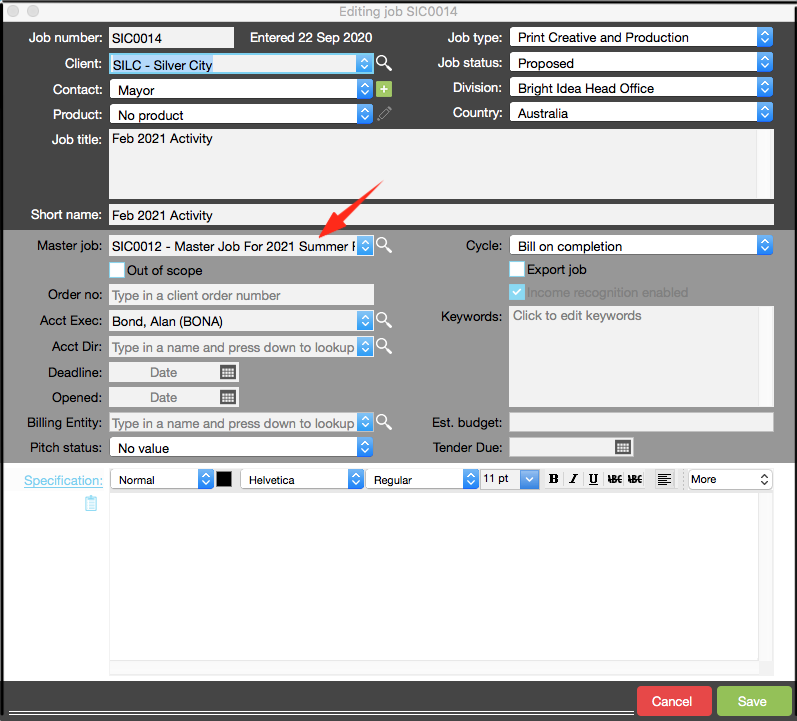
Step 4 The sub job now has a master job
|
Create Tasks for the Master Job
Follow the process below if you wish to create tasks for a master job:
There are two options: 1 Load a planning template if you have one or 2 create tasks for a master job. |
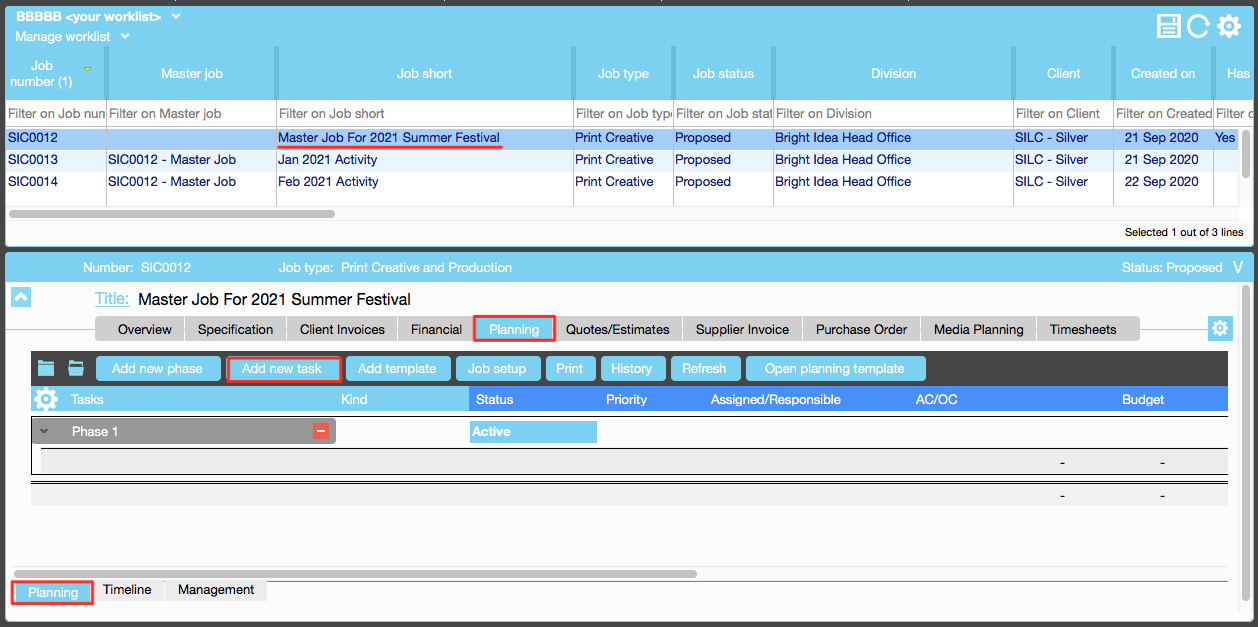
Step 1 Click on “Add new task” in the planning tab
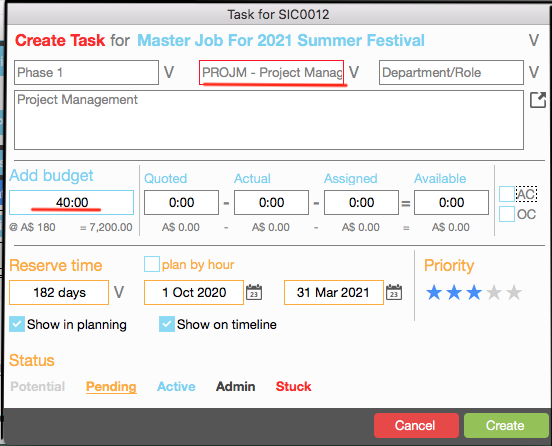
Step 2 Create a task for 40 hrs of project management for period 1 Oct 2020 to 31 Mar 2021
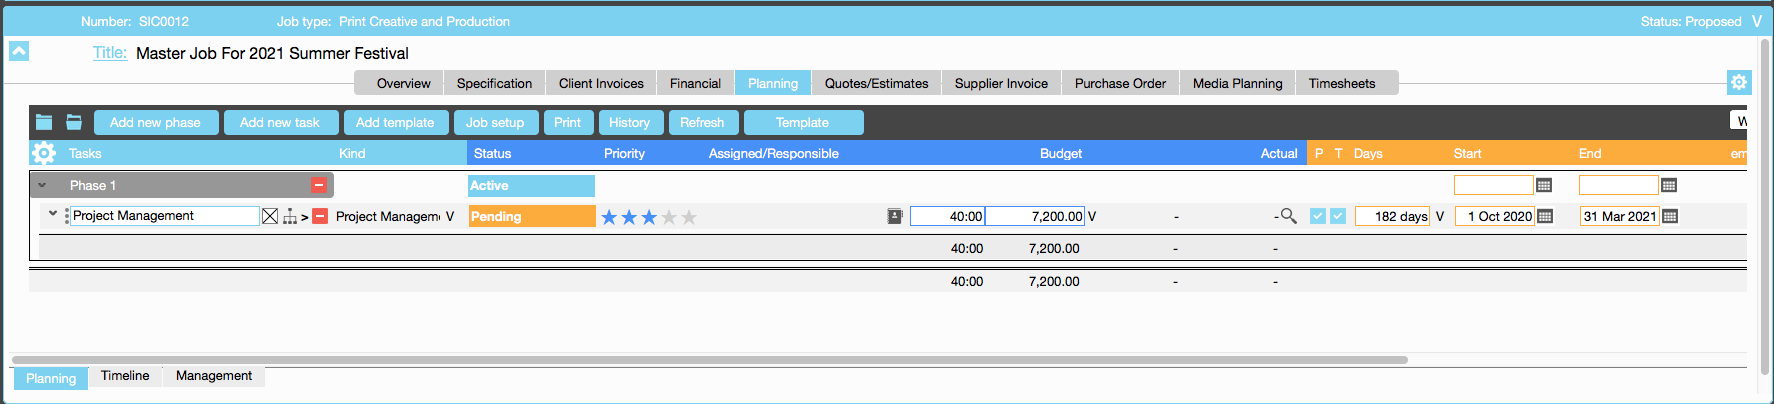
Step 3 Example of task created for master job
|
Create tasks for sub jobs
There are two options: 1 Load a planning template if you have one or 2 create tasks for a sub jobs Note: It is more efficient if you have a template for sub jobs esp if the sub jobs are a repeated eg a project is repeated in various locations. |
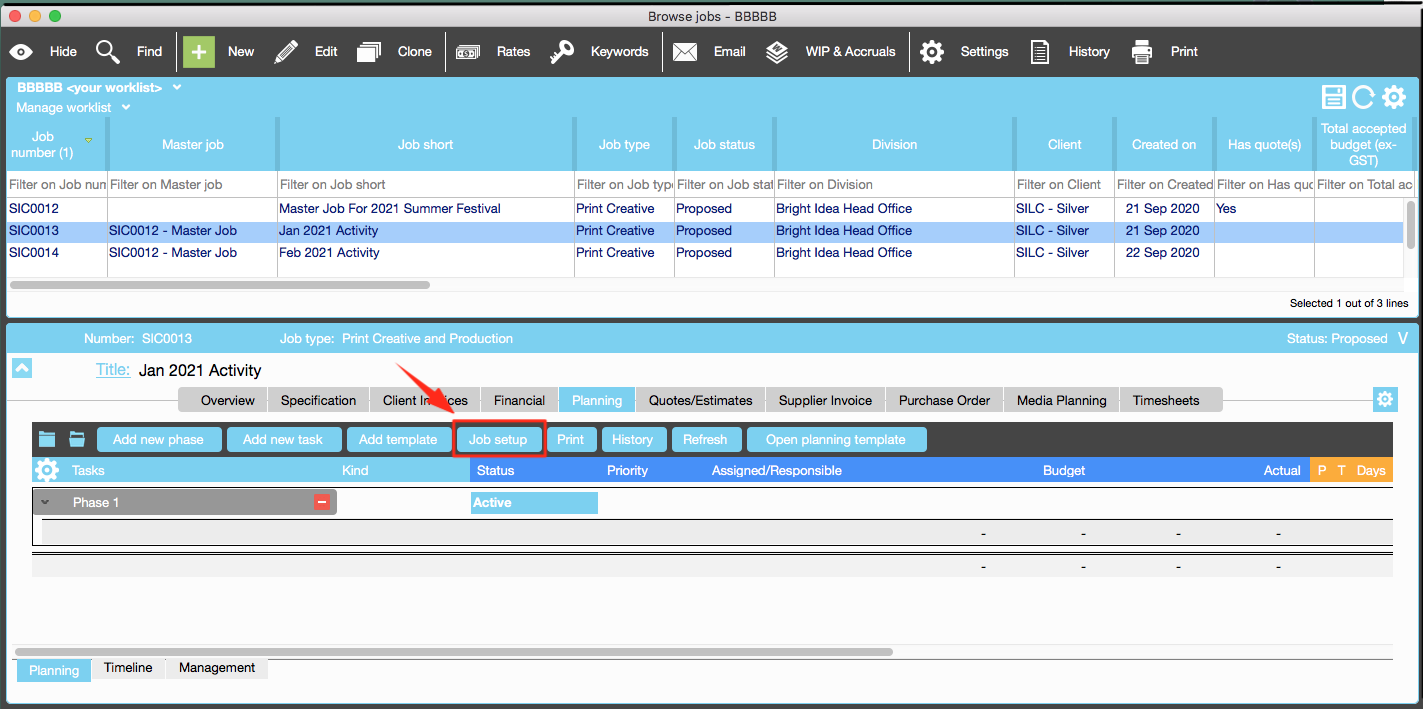
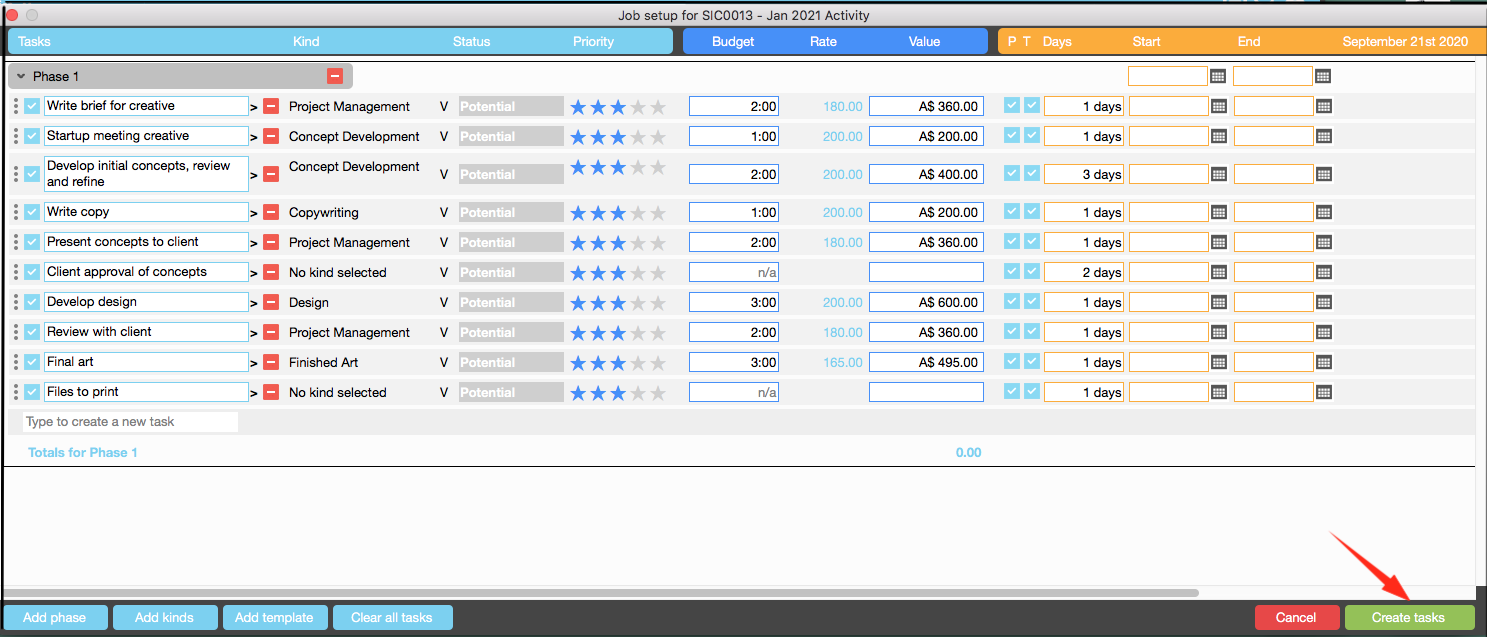
In the example below, we are using a predefined planning template Step 1 Click on “Job setup”
Step 2 Click on “Add template”
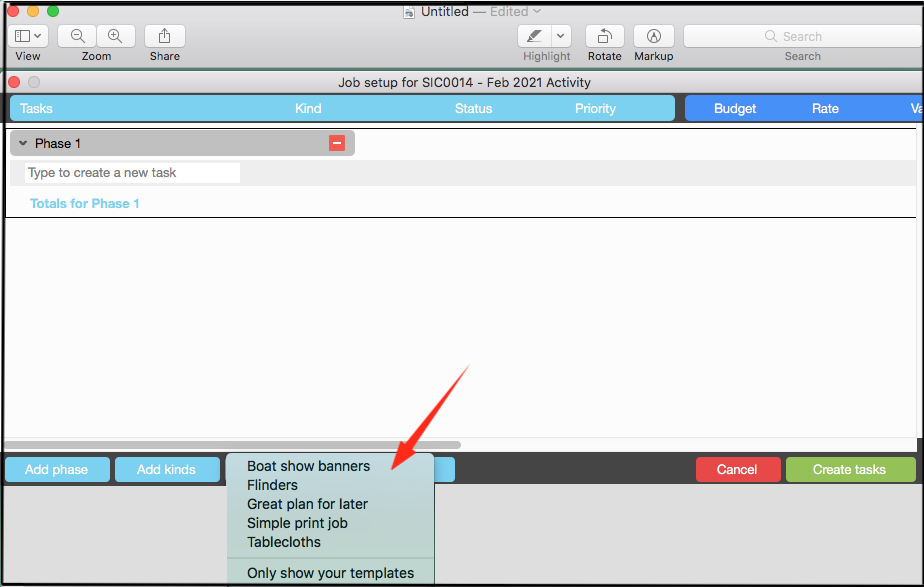
Step 3 Select a template
Step 4 Click on “create tasks”
|

Create Estimates
Estimates are created after the tasks are created
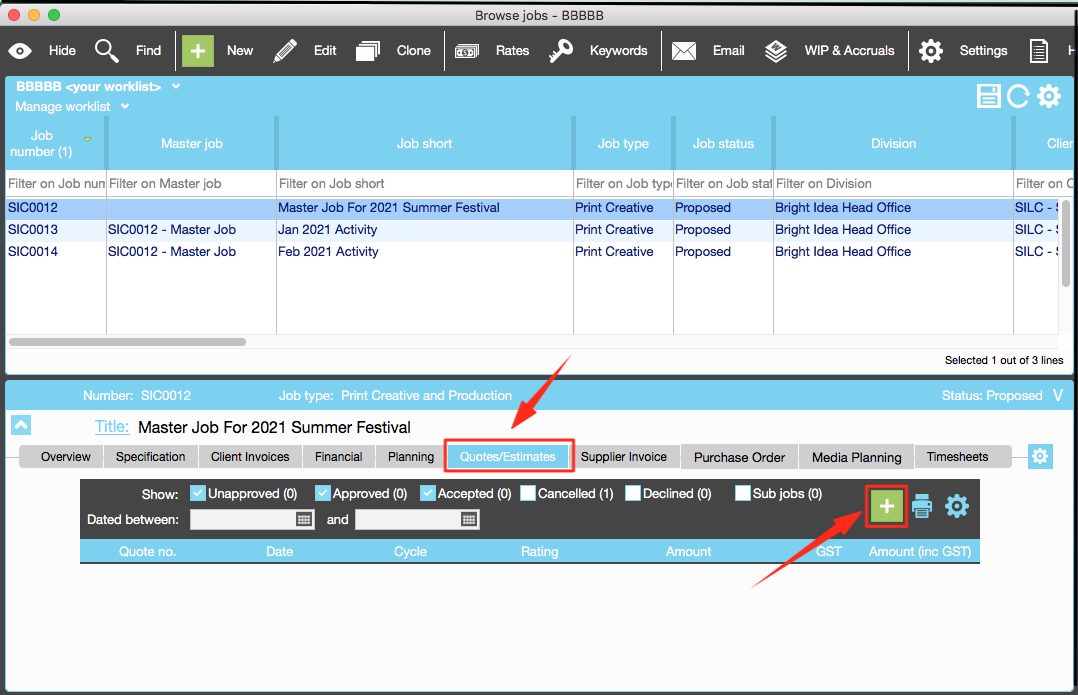
Step 1 Click on estimates tab and green plus sign
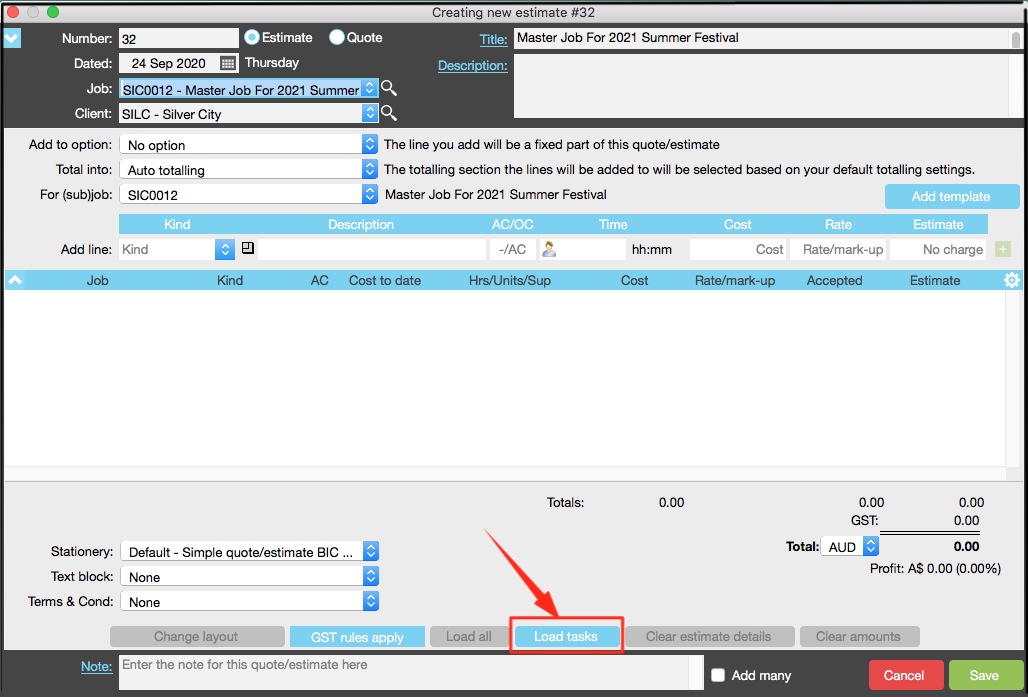
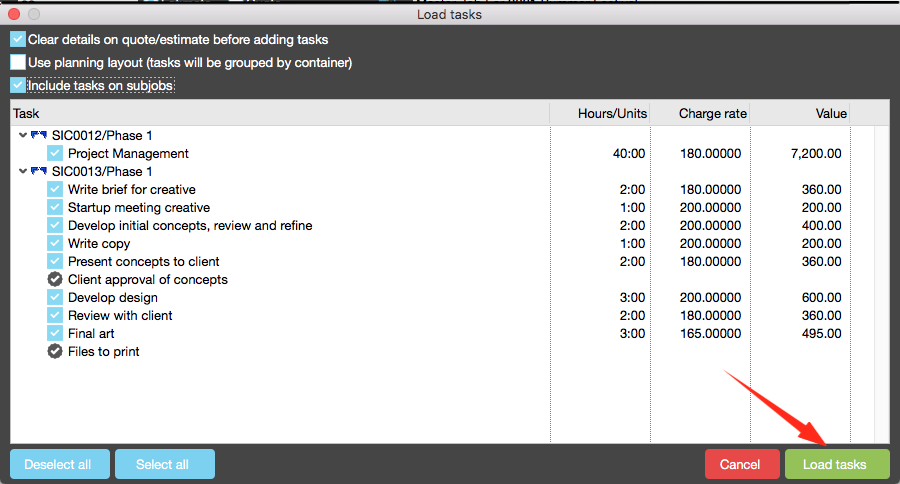
Step 2 Click on “load tasks”
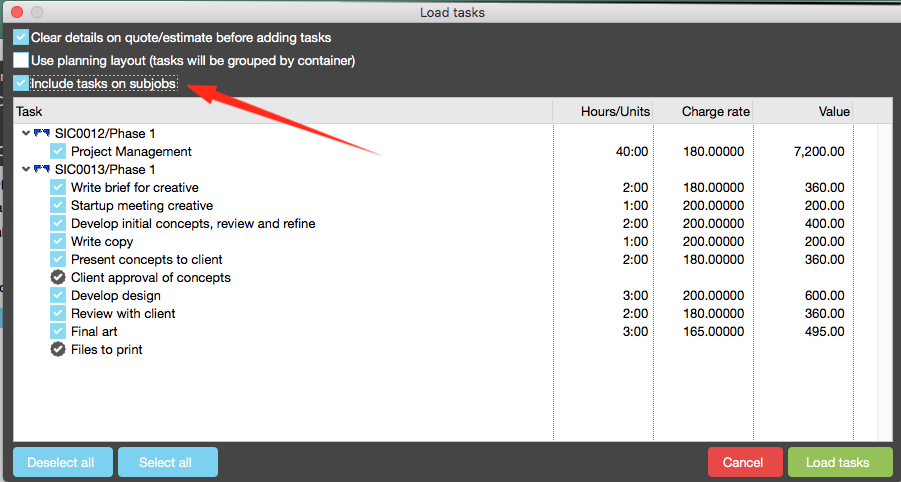
Step 3 select option to include all sub tasks
Step 4 Click on “load tasks' to create estimate
Step 5 Example of a completed estimate
|

Create Invoices
Invoices can be created for each sub-job or at the master job level for all sub jobs
Create Invoice for Sub Job
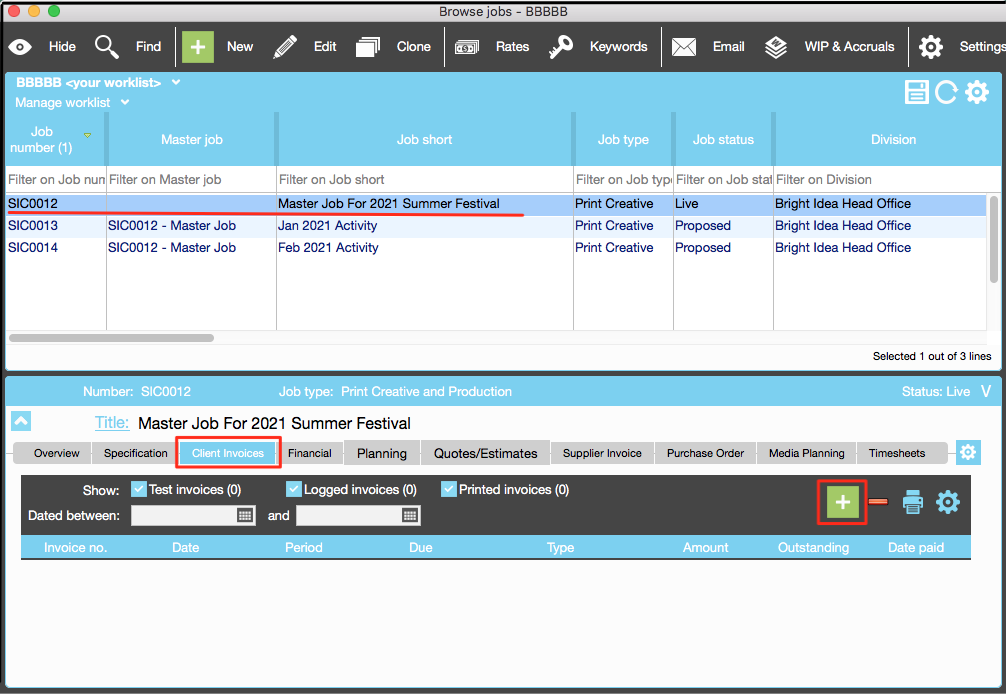
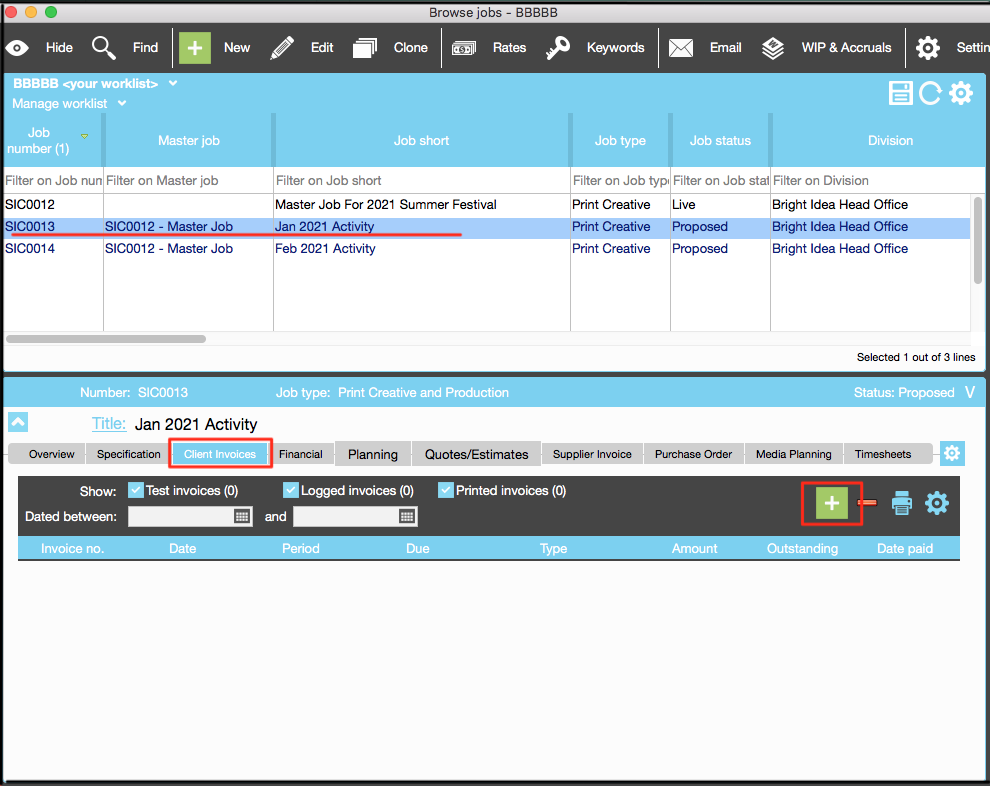
Step 1 Highlight sub job, click on the “Client Invoices” tab and the “green plus sign”
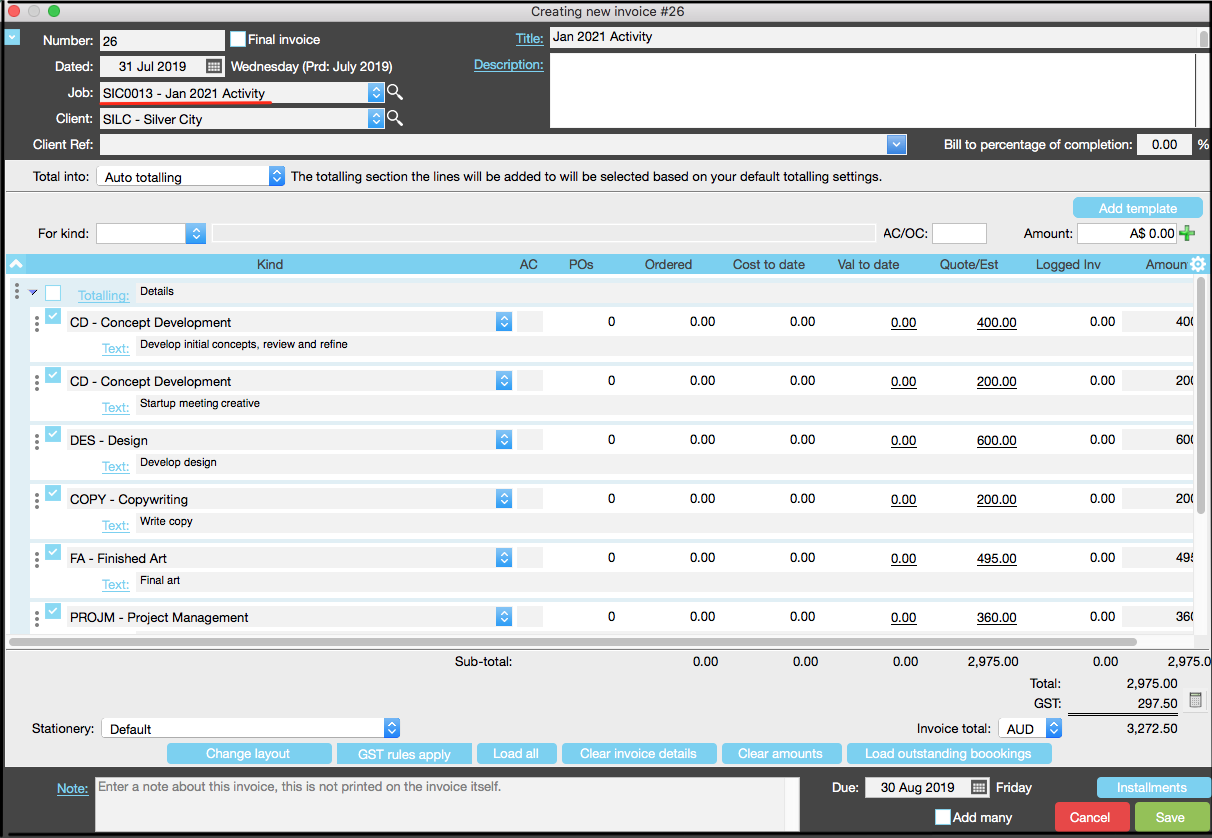
Step 2 “Create invoice” screen for the sub job
|
Create Invoice for Master and Sub jobs
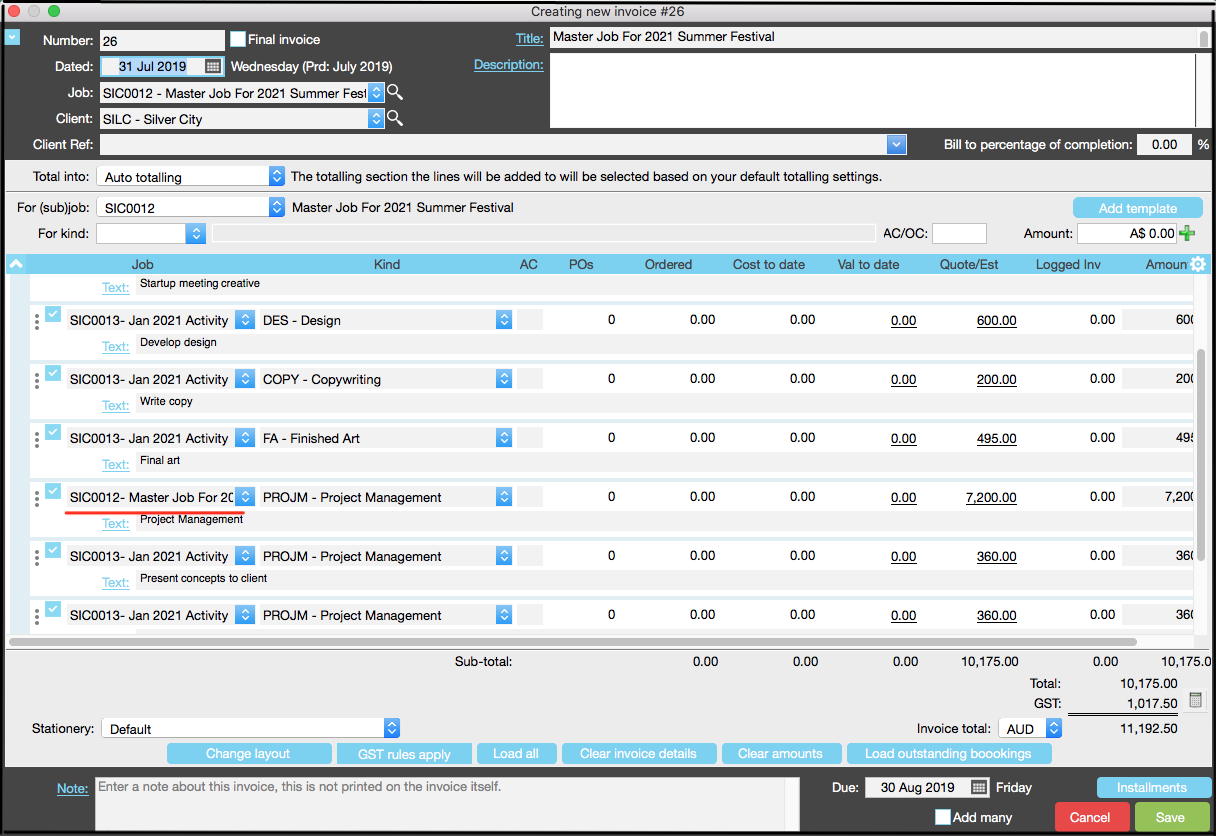
Step 1 HIghlight master job and click on the “create invoice” tab and the “green plus sign”
Step 2 All information about master and job jobs is loaded into the screen below. You can select lines you wish to invoice.
|