Stationery Templates
There are many sections in this window, don't be overwhelmed as there is no need to adjust everything.
Please contact JobBag support if you need us to assist you, we are happy to help.
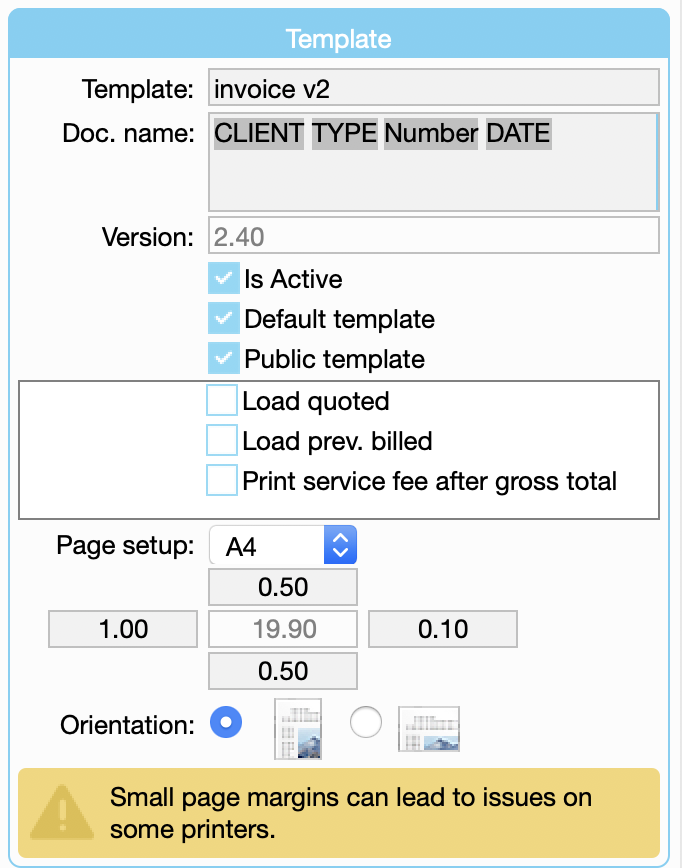
| Template | The name of the template. This is shown in the printer window; you can have many templates to choose when printing documents |
|---|---|
| Doc. name | The name of PDF files. Right click in this field to see the options to add to the file name. In the example above, the PDF name will be saved with the client name, the type of document, the number of the document and the date of the document. You don't have to use these options, these can be overwritten |
| Version | The number of revisions to the template |
| Is Active | Tick if you want the template as an option to select when printing documents. If not ticked it will be saved, just not accessible to use for printing |
| Default template | When selected, the template is chosen as the default for documents |
| Public template | When selected all users can choose the template |
| Load quoted | This is used on the 3 and 4 column invoice templates, it loads the amount from the quote on the job |
| Load prev. billed | This is used on the 3 and 4 column invoice templates, it loads the previous amount billed on the job |
| Print service fee after gross total | This prints the service fee after the gross Total instead of before |
| Page setup | Select the size of the page to print on and select the margins for the page |
| Orientation | The orientation of the page setup |
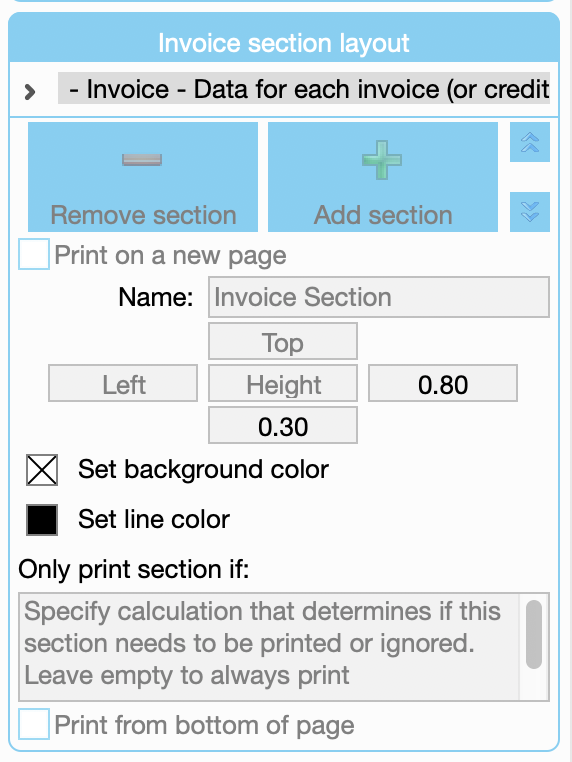
| Section Layout | You can add sections, remove them and move them up or down |
|---|---|
| Print on new page | Select this if you want the highlighted section to print on a new page |
| Name and section margins | The name of the section and margins for the highlighted section |
| Set colours | You can set the background colour of the section and the colour of the lines |
| Only print if | You can select a section to print only if it has certain information in it; a job order number for example |
| Print from bottom of page | Select this if you want the section to print at the bottom of the page |
| Fields | These fields are information fields that appear in documents; these are are added to sections to print |
Header Section
- To edit a header graphic, first, ensure that your graphic is in PNG or JPG format.
- Select to highlight the header section.
- Go to Edit > Paste from File, navigate to your saved preferred graphic.
- If the graphic needs to line up with text but has a border, adjust section margins to suit. Ideally a graphic without a border is best to use.